


 Reply With Quote
Demon (12-06-2016),FmobxBull666 (09-26-2018),Lxys (12-07-2016),MikeRaarupBirk (12-06-2016),NemsisPlay (11-24-2018),SeXZeFPS (02-15-2017),The Real DethStrike (12-06-2016),TheFullMC123 (08-30-2017)
Results 1 to 15 of 15
-
12-05-2016 #1Dual-Keyboard Member


- Join Date
- Jan 2014
- Gender

- Location
- Posts
- 411
- Reputation
 23
23- Thanks
- 843
- My Mood
-


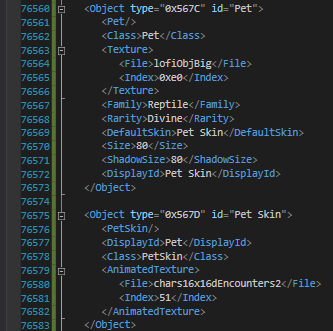
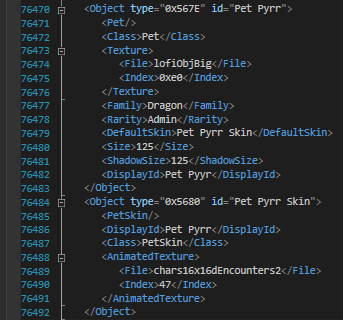
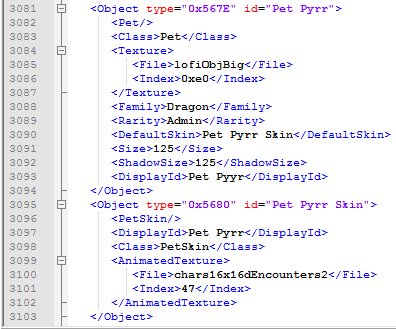
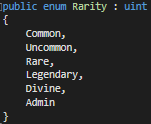
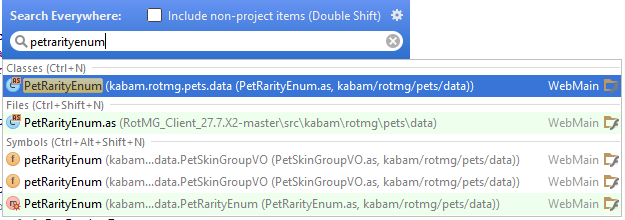
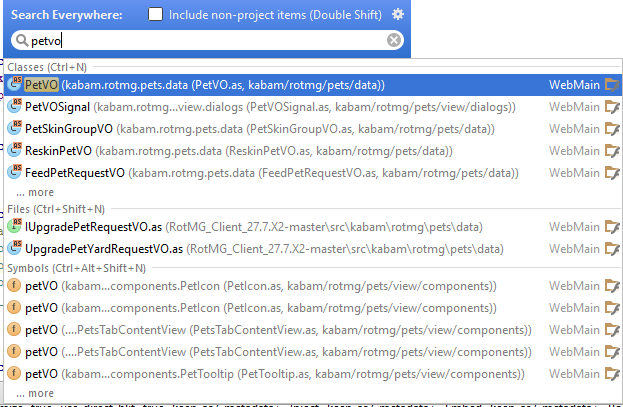
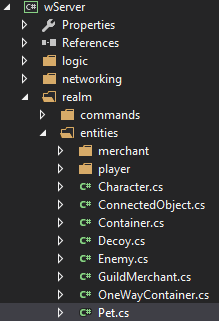
[FSOD] [AS3] How to add new pet skins, new pet families and new pet rarities!
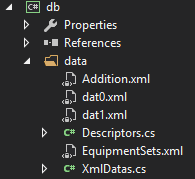
Hey everyone, this tutorial is going to cover how to add new pet skins, new pet families and new pet rarities.
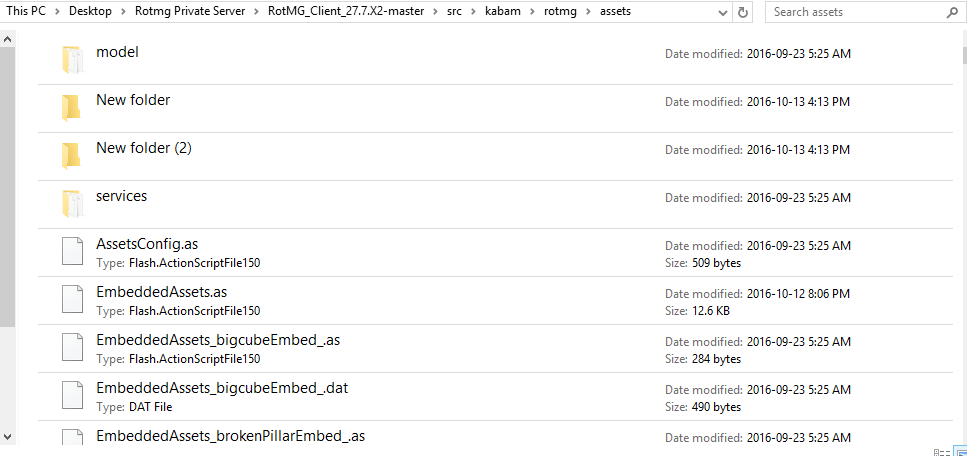
You are going to need a working fabiano source and the as3 client set up for it.
(You can give it a try on normal fabiano client, for some reason it kept breaking the client completely for me and @Lunacy Gaming, so I'd tell you to copy the source if you are going to attempt to make it work!)
I really hope this isn't too hard to understand and that alot of people can get this to work! Press that thanks button if this helps you !
!
-
The Following 8 Users Say Thank You to BurgerLoverMx For This Useful Post:
-
12-05-2016 #2Banned


- Join Date
- Oct 2016
- Gender
- Location
- Posts
- 219
- Reputation
- 10
- Thanks
- 56
Nice tutorial
-
12-06-2016 #3MPGH Expert

- Join Date
- Jul 2015
- Gender
- Location
- Posts
- 1,095
- Reputation
- 86
- Thanks
- 316
- My Mood
-

 Ur Inventory And Equip Bars Gives Me OCD Probelm + HP And MP
 Originally Posted by BurgerLoverMx
 Nice
Nice
-
12-06-2016 #4Blackhat Hacker

- Join Date
- Mar 2016
- Gender
- Posts
- 1,583
- Reputation
- 38
- Thanks
- 3,775
- My Mood
-


Smooth tutorial, nice

-
12-06-2016 #5Stalin's Son


- Join Date
- Dec 2016
- Gender
- Posts
- 128
- Reputation
- 17
- Thanks
- 41

Cool
 As child i scavenged for food. Not because i was hungry, but because i was greedy.
-
12-06-2016 #6
ThreadstarterDual-Keyboard Member
- Join Date
- Jan 2014
- Gender
- Location
- Posts
- 411
- Reputation
- 23
- Thanks
- 843
- My Mood
-
Thanks! Originally Posted by LexussD
Unfinished :/ Originally Posted by DemonLives
Thanks mike Originally Posted by MikeRaarupBirk
!
Thanks! Originally Posted by Nikolai Belinski
-
12-06-2016 #7Novice

- Join Date
- Apr 2015
- Gender
- Location
- Posts
- 73
- Reputation
- 16
- Thanks
- 8
- My Mood
-

 How would I hatch this? when I make an egg it says please upgrade pet yard:/ Originally Posted by BurgerLoverMx
-
12-06-2016 #8
ThreadstarterDual-Keyboard Member
- Join Date
- Jan 2014
- Gender
- Location
- Posts
- 411
- Reputation
- 23
- Thanks
- 843
- My Mood
-
Hatch the new pet's rarity? I didn't have any problems with my own egg. Originally Posted by Legendaryjj02
Here is it's xml if you want to copy it and test:
Code:<Object type="0x5685" id="Mysterious Dragon Egg"> <Class>Equipment</Class> <Item/> <Texture> <File>lofiObj5</File> <Index>0x89</Index> </Texture> <SlotType>26</SlotType> <Description>A mysterious dragon egg.</Description> <PetFamily>Dragon</PetFamily> <Rarity>Admin</Rarity> <Activate>CreatePet</Activate> <Consumable/> <BagType>6</BagType> <feedPower>0</feedPower> <DisplayId>Mysterious Dragon Egg</DisplayId> </Object>
-
12-07-2016 #9Novice
- Join Date
- Apr 2015
- Gender
- Location
- Posts
- 73
- Reputation
- 16
- Thanks
- 8
- My Mood
-
Didn't help for some reason but thanks for trying I already had an egg turns out all I had to do was change 1 bool thread to fix and add another instance and now it works perfectly Originally Posted by BurgerLoverMx

-
08-18-2017 #10New Member

- Join Date
- Jan 2016
- Gender
- Location
- Posts
- 19
- Reputation
- 10
- Thanks
- 18
- My Mood
-


I know this is an old thread, but how do i make it for normal players to achieve my custom rarity, and for some reason i cant seem to be able to get my pet higher than level 100 even though i changed it on max level, any help?
-
08-21-2017 #11Newbie
- Join Date
- May 2017
- Gender
- Posts
- 26
- Reputation
- 10
- Thanks
- 0
EmbeddedData_PetsCXML.dat cant find that +BurgerLoverMx
Last edited by Filisha; 08-21-2017 at 03:58 PM.
-
08-21-2017 #12
ThreadstarterDual-Keyboard Member
- Join Date
- Jan 2014
- Gender
- Location
- Posts
- 411
- Reputation
- 23
- Thanks
- 843
- My Mood
-
I'm sorry I didn't really look into that you'd have to maybe ask someone else? Make a help request maybe? Originally Posted by PserverErk
Are you using the as3 client?? Originally Posted by Filisha
-
08-21-2017 #13Newbie
- Join Date
- May 2017
- Gender
- Posts
- 26
- Reputation
- 10
- Thanks
- 0
I cant find teh" intellij" now
-
08-22-2017 #14Newbie
- Join Date
- Jun 2016
- Gender
- Posts
- 28
- Reputation
- 10
- Thanks
- 0
- My Mood
-
Does this work for default FSOD, because mine doesn't have the src folder to open in intellij so i cant do rarities and families.
-
08-30-2017 #15New Member
- Join Date
- Aug 2017
- Gender
- Posts
- 8
- Reputation
- 10
- Thanks
- 0

Tutorial for petstones?
Similar Threads
-
[Fabianos AS3] How to add more stars
By Orbit in forum Realm of the Mad God Private Servers Tutorials/Source CodeReplies: 10Last Post: 11-23-2016, 12:41 AM -
[Solved] [FSOD (not AS3)] How to add more class/item sprite sheets?
By Zxoro in forum Realm of the Mad God Private Servers HelpReplies: 4Last Post: 10-25-2016, 11:11 PM -
[AS3] How to add an interactive object with a panel and frame
By OmegaBM in forum Realm of the Mad God Private Servers Tutorials/Source CodeReplies: 11Last Post: 03-31-2016, 07:08 PM -
[AS3] How to add a entity, with panel, button(s) and content
By lkdjnfoskjednfblksjdfn in forum Realm of the Mad God Private Servers Tutorials/Source CodeReplies: 20Last Post: 02-27-2016, 08:49 AM -
[Help Request] How are the Iawis getting the twi archmage set and divine pets?
By furbo in forum Realm of the Mad God Help & RequestsReplies: 6Last Post: 04-26-2015, 12:25 AM