


===================================
Thread: make an iphone
Results 1 to 3 of 3
Hybrid View
-
03-29-2009 #1Upcoming MPGHiean


- Join Date
- Mar 2008
- Gender

- Location
- Posts
- 3,382
- Reputation
 21
21- Thanks
- 4,294,967,295
- My Mood
-


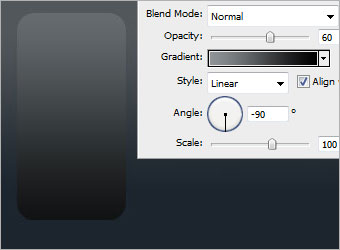
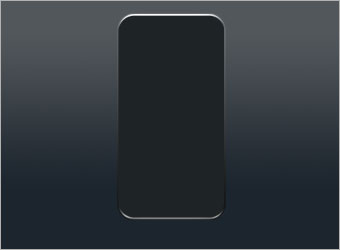
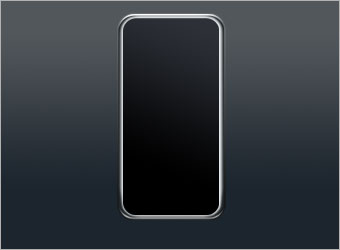
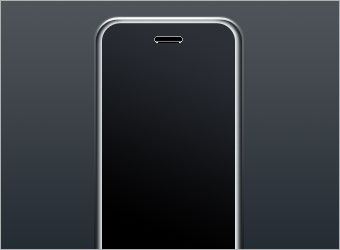
make an iphone
Last edited by GG2GG; 03-29-2009 at 06:57 PM.

-
03-29-2009 #2OOGILY BOOGILY

- Join Date
- Sep 2006
- Gender
- Location
- Posts
- 12,531
- Reputation
- 212
- Thanks
- 2,026
- My Mood
-


 Originally Posted by GG2GG

re up the pics to photobucket or some else, where it dose not look it was leached from other site
=_=''
-
03-29-2009 #3Banned


- Join Date
- Dec 2008
- Gender
- Location
- Posts
- 4,376
- Reputation
- 430
- Thanks
- 409
- My Mood
-

All the pics are invalid.


Similar Threads
-
How to make your own iPhone Ringtone and transfer it to your iPhone directly?
By zzyjetty521 in forum Spammers CornerReplies: 4Last Post: 03-26-2013, 04:05 AM -
iPhone App makes popcorn!
By Gyurin in forum GeneralReplies: 20Last Post: 03-06-2011, 02:33 PM -
Not To Hard To make (Right?)
By brucevduyn in forum Help & RequestsReplies: 12Last Post: 01-17-2006, 02:51 PM -
Plz I Want Maple Global Hacks And Where Do I Get Game Engine 2 Make The Hacks Work???
By mattinthehat in forum MapleStory Hacks, Cheats & TrainersReplies: 3Last Post: 01-15-2006, 06:12 PM -
Plz Man Make Me A Sign Plz
By Hennu50 in forum Help & RequestsReplies: 2Last Post: 01-08-2006, 04:55 PM