My Photoshop Resources (56k Warning)
My Photoshop Resources (56k Warning)
Alright, this is directly copied and pasted from my post on another forum, so don't complain if links don't work or something <_<
Just so you know, the tutorials are in chronological order. The stuff at the top is 4 years old, and the stuff at the bottom is closer to 6 months old. So expect crappier stuff at the top, and better stuff at the bottom.
Multicolor Tutorial:
Full Halo Sig Tutorial:
Another Full Sig Tutorial:
Suprise! Another Full Sig Tut:
Sprite Signature Tutorial:
Free PSD:

Click on the sig to download it. I made it for a guy on another forum for free, so I don't think he'd care if I posted it here. I hate razorlight, but as I said, it was a request <_<
The Who Tutorial:
Abstract Tutorial:
Free PSD's
Just so you know, the tutorials are in chronological order. The stuff at the top is 4 years old, and the stuff at the bottom is closer to 6 months old. So expect crappier stuff at the top, and better stuff at the bottom.
Multicolor Tutorial:
Ypu, I made a tut, on making multicolor sigs, I'm that bored, I'll be using my cloud sig as an example
1) open up your sig you wanna multicolor(I didn't desaturate the render to make the effect even better)

2) Create a new color balance layer(in this case I made it a fire color)

3) Once the layer is created, press ctrl+i to invert the color back to black and white
4) Create another color balance layer (I used blu, don't think I need a pic for this)
5) Then, press ctrl+i again to invert the color back
Multicolor fun time
6) Take out any brush you like, and select the color balance layer that in my case, is fire color

7)Brush over the areas in which you want to make that color

8) Select the other color balance layer, and brush over the areas you want to be that color
FINISHED PRODUCT
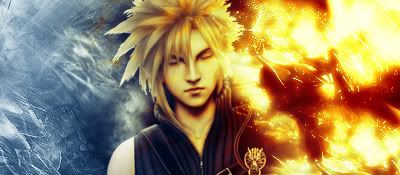
There ya go, my first tut, hope u enjoy, and btw, mine will look different than yours, because my fire color are is brushed with sparkle brushes, which look really good like fire, and my blue part is a smoother type of brush
1) open up your sig you wanna multicolor(I didn't desaturate the render to make the effect even better)
2) Create a new color balance layer(in this case I made it a fire color)
3) Once the layer is created, press ctrl+i to invert the color back to black and white
4) Create another color balance layer (I used blu, don't think I need a pic for this)
5) Then, press ctrl+i again to invert the color back
Multicolor fun time
6) Take out any brush you like, and select the color balance layer that in my case, is fire color
7)Brush over the areas in which you want to make that color
8) Select the other color balance layer, and brush over the areas you want to be that color
FINISHED PRODUCT
There ya go, my first tut, hope u enjoy, and btw, mine will look different than yours, because my fire color are is brushed with sparkle brushes, which look really good like fire, and my blue part is a smoother type of brush
YAY, a full sig tut, so, listen up
1) Make a document with a black background, I made mine 400x150

2) Alot of people use clouds in their sig, but I prefer just brushing, so take out your favorite brushes in white, and start brushing. My burshes are Here

3) Continue brushing until the sig looks fairly full, this is a simple sig tut, so I'm not going to go into more layers of brushing, although feel free to experiment with more layers and such. This is my result

4) ok, thats enough brushing for now, time for the render, I'd advise going to the Gamerenders Forums and looking around for something you like, once you've saved the image, in this case, a master chief, open it up in photoshop

5) Now, that renders a little bit big huh? Just go Image>Image Size and decide how big it is, see it says how big it is in pixels? Click on pixels, and it drops down, in the drop-down menu, select percent, it makes it a bit easier, I'll cut my render in half.

6) Now, with your lasso tool, cut out the render you now have in half, mine is a clear png, so I can cut out rather generally, but if your render has a white background, you have to be more careful

7)copy and paste the selection onto your sig, and push ctrl+t to move it around in the sig. I go this

8)Now, take out the lasso tool, and set your feather to 35 px, and draw generally around your render, don't be careful, you want to cut some off

9) Now, with it still selected, click the add layer mask button

10) Now your render should look kinda blended. This next step is optional, I'll desaturate my render by going to Layer>New Layer>Hue/Saturation and putting your saturation bar al the way at the left. Then click ok. This is what mine looks like so far

11)Time for color, there are several ways to do this, but I'll do the more complex way simply because thats what I want to do. Go Layer>New Adjustment Layer>Color Balance and fiddle with the sliders until you get what you want.

12) Now, I want this sig to be kinda grungy, so if you want, go filter>render>clouds on your color balance layer, which fades the color.\

13) ok, you can call that sig, but I want my colors to be more grungy, so I'm gonna repeat step 11 and 12 several more tomes with different colors, feel free to do this, or just keep it blue like mine.

14) Now, just add text, depending on your sig, different text would look good. I'm using the freshbot font, with a simple outer glow. Here's the final result

And thats my tut, feel free to ask questions and post yout results
1) Make a document with a black background, I made mine 400x150
2) Alot of people use clouds in their sig, but I prefer just brushing, so take out your favorite brushes in white, and start brushing. My burshes are Here
3) Continue brushing until the sig looks fairly full, this is a simple sig tut, so I'm not going to go into more layers of brushing, although feel free to experiment with more layers and such. This is my result
4) ok, thats enough brushing for now, time for the render, I'd advise going to the Gamerenders Forums and looking around for something you like, once you've saved the image, in this case, a master chief, open it up in photoshop
5) Now, that renders a little bit big huh? Just go Image>Image Size and decide how big it is, see it says how big it is in pixels? Click on pixels, and it drops down, in the drop-down menu, select percent, it makes it a bit easier, I'll cut my render in half.
6) Now, with your lasso tool, cut out the render you now have in half, mine is a clear png, so I can cut out rather generally, but if your render has a white background, you have to be more careful
7)copy and paste the selection onto your sig, and push ctrl+t to move it around in the sig. I go this
8)Now, take out the lasso tool, and set your feather to 35 px, and draw generally around your render, don't be careful, you want to cut some off
9) Now, with it still selected, click the add layer mask button
10) Now your render should look kinda blended. This next step is optional, I'll desaturate my render by going to Layer>New Layer>Hue/Saturation and putting your saturation bar al the way at the left. Then click ok. This is what mine looks like so far
11)Time for color, there are several ways to do this, but I'll do the more complex way simply because thats what I want to do. Go Layer>New Adjustment Layer>Color Balance and fiddle with the sliders until you get what you want.
12) Now, I want this sig to be kinda grungy, so if you want, go filter>render>clouds on your color balance layer, which fades the color.\
13) ok, you can call that sig, but I want my colors to be more grungy, so I'm gonna repeat step 11 and 12 several more tomes with different colors, feel free to do this, or just keep it blue like mine.
14) Now, just add text, depending on your sig, different text would look good. I'm using the freshbot font, with a simple outer glow. Here's the final result
And thats my tut, feel free to ask questions and post yout results
err...a simple sig tut, merry fecking kwasmas.
http://browse.deviantart.com/resourc...der=9&limit=24
thats the link for the c4d renders

http://browse.deviantart.com/resourc...der=9&limit=24
thats the link for the c4d renders
Yay for full sig tuts, this ones pretty big, so yeah. It's 2 megs, and will take a long time to load, so just wait it out if you have to.

it'd be cool if you posted your results ^_^
Comment or I'll beat you with a stick -)(
it'd be cool if you posted your results ^_^
Comment or I'll beat you with a stick -)(
This is a tutorial to make my sig. I'd make it more detailed, but my computer HATES big images, so if I made it any bigger I think my computer would explode :O

Click on the sig to download it. I made it for a guy on another forum for free, so I don't think he'd care if I posted it here. I hate razorlight, but as I said, it was a request <_<
So, here's a photomanipulation tutorial for my current sig. IT IS MADE FOR BEGINNERS! Don't reply saying "gud but ez." It's not meant for you. Yes the techniques are simple. Go away 

kthx
kthx
Yeah, I made a tutorial for my abstract sig. I know most people here would prefer a tutorial for my minimalistic sig, but whatever. My friend at school asked how to make this, and him>you guys <_____< so anyway, I guess I'll post it here.

So, here are 2 free psd's for everyone. Click on the sig for the psd.


I'm going to upload my The Hip sig tomorrow or something. It's 36 megs, so it'll take a while, and I need to go now <_<
I'm going to upload my The Hip sig tomorrow or something. It's 36 megs, so it'll take a while, and I need to go now <_<
very impressive
This thread is closed for replies.
