Reset Glitch Hack on Slim Xbox360
This Tutorial explains how to hack your Xbox 360 Slim with the Reset Glitch Hack in order to launch unsigned code.
I: Software and Hardware needed
Prerequisites :
★ Installed XillinX Lab Tools
Software :
★ Python and Pyton Crypto
★ Impact (from Xilinx Lab Tools)
★ NandPro (>= v2.0e)
Hardware :
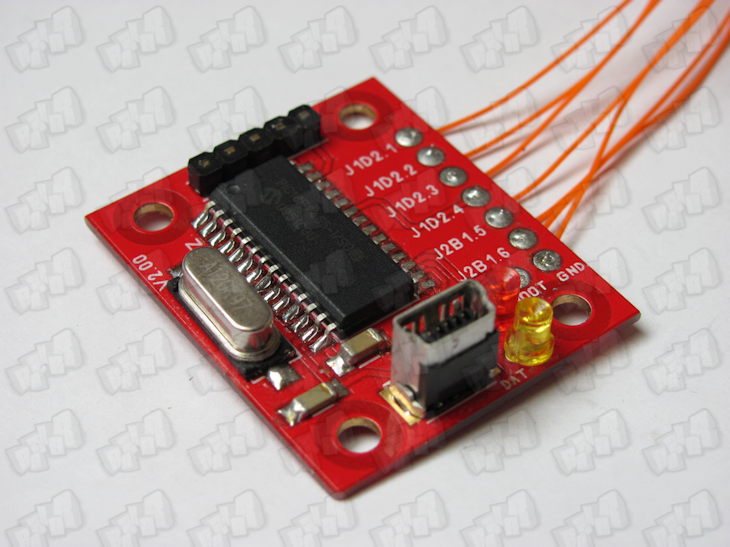
★ USB SPI Programmer to dump/flash the Xbox360's NAND
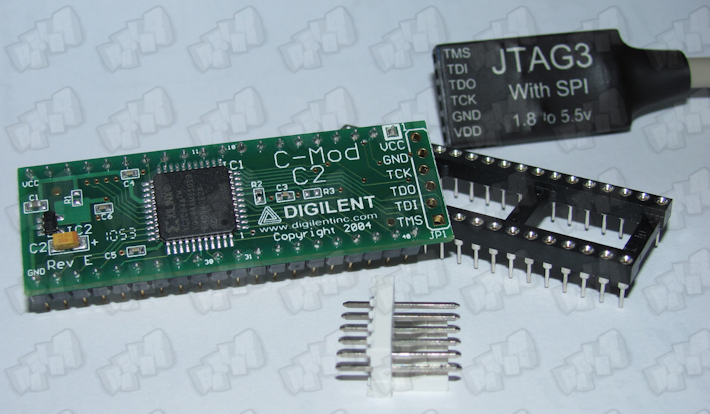
★A XC2C64A CoolRunner-II CPLD (aka Digilent C-mod), matching socket and a XilinX JTAG Programmer cable
★ A 220pF capacitor
★ Soldering material & Soldering experience

II: Dumping NAND
Step 1 : Use the following diagram (or MODFREAKz's one) to Solder your USB SPI Programmer to the Xbox 360 motherboard
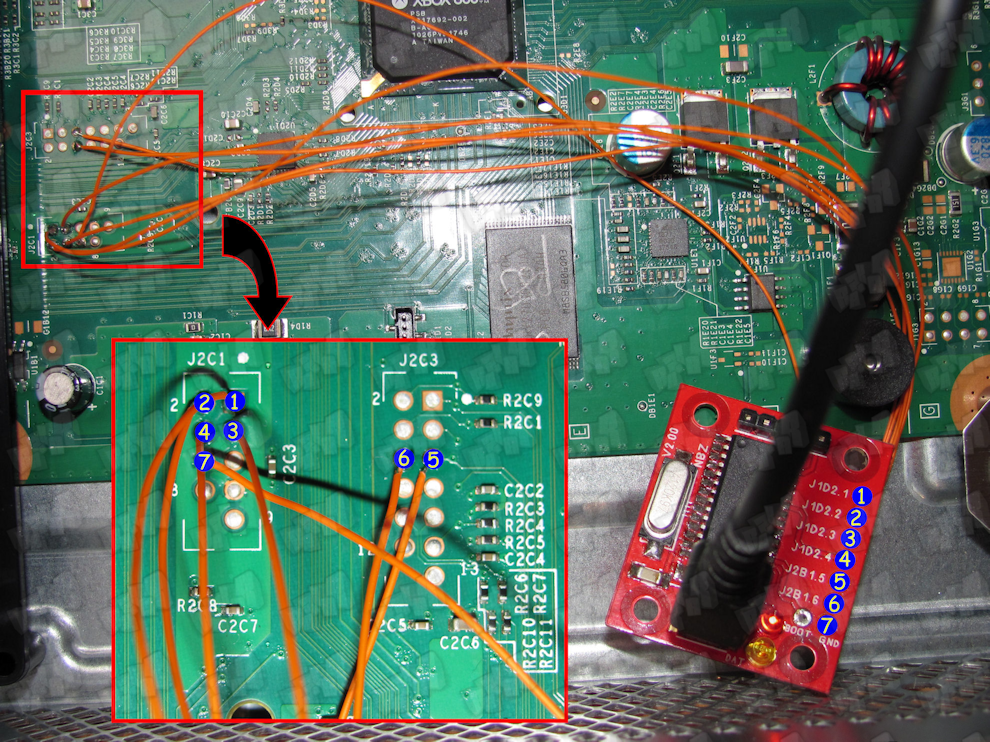
Step 2 : Open windows’s command prompt and launch NandPro.
Step 3 : Dump your nand twice by using the read command for 16MB NAND :
nandpro usb : -r16 nanddumpname.bin
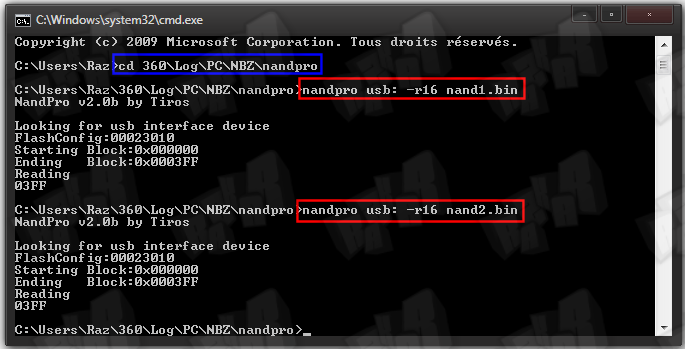
Step 4 : Compare the two dumps with the following command (you can use md5checksum too) :
fc /b nanddumpname.bin nanddumpname2.bin
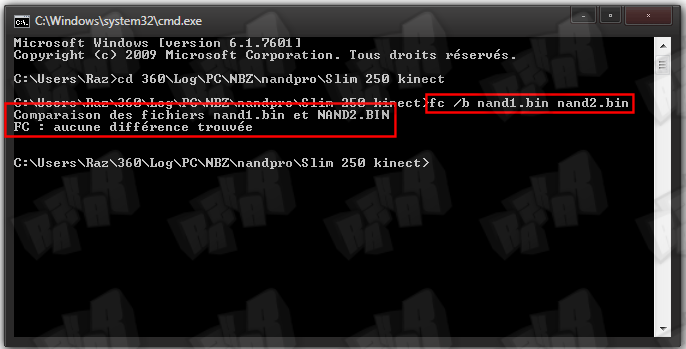
You should have something like FC : No difference found. If the two dumps don’t match, do a new dump and check again.
II: Installation of Python and Python Crypto
Step 1 : Install Python 2.7 (32bit!) with the default settings :
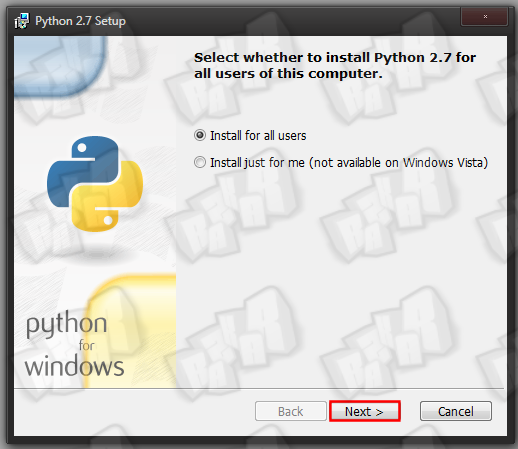
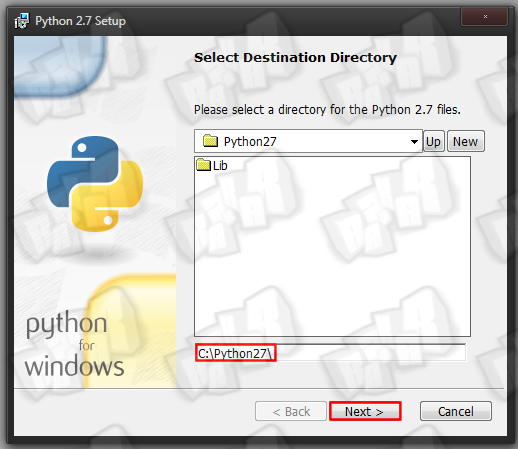

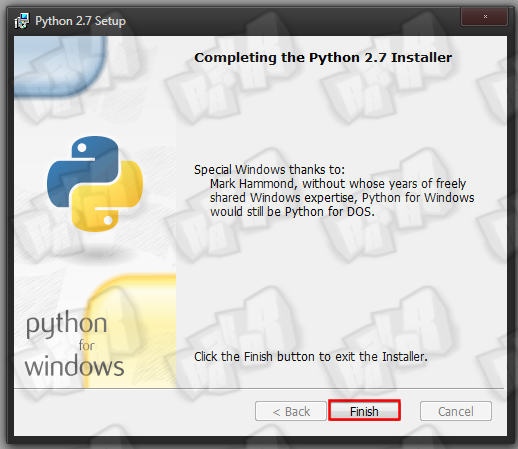
Step 2 : Install PyCrypto 2.3 with the default setting :
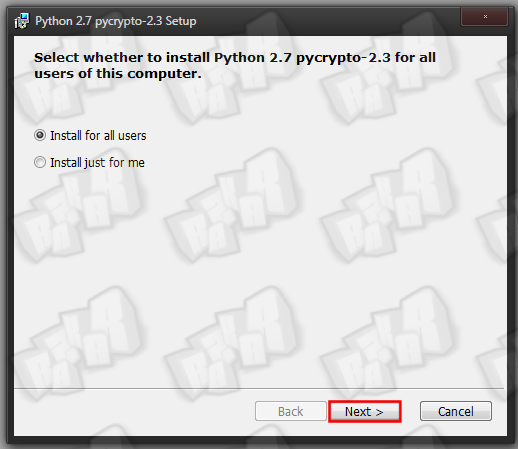
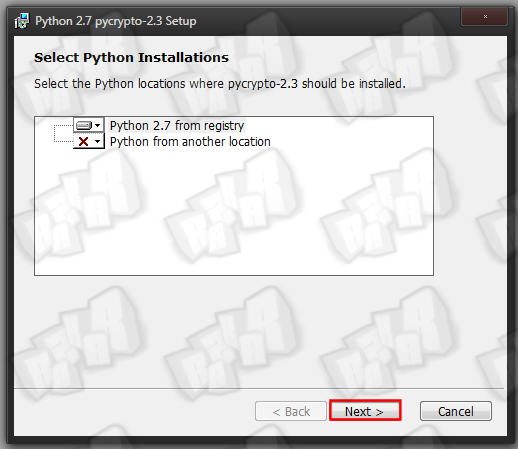
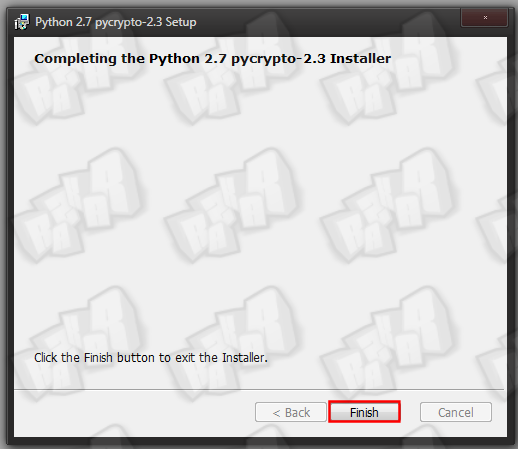
To enable python in windows’s command prompt, we will have to modify the environment variables .
Step 3 : Go in Control Panel > System > Advanced system settings
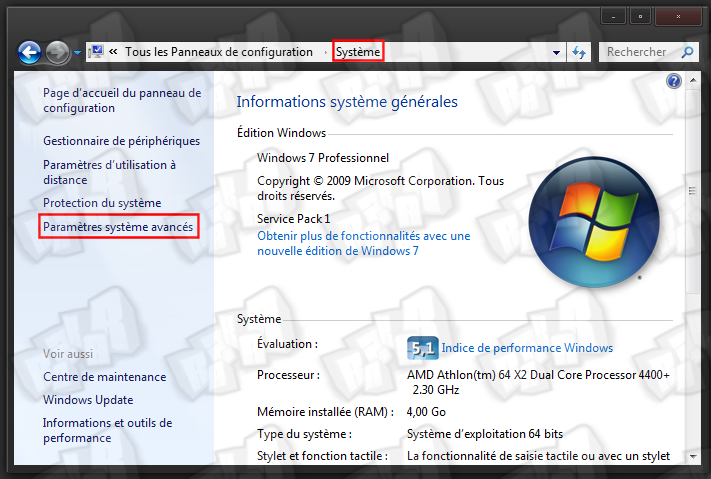
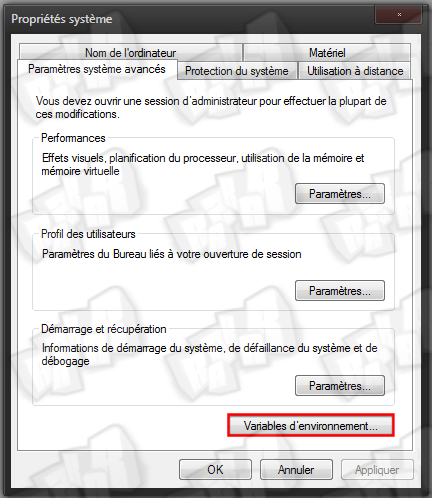
Step 4 : Click on environnement variables
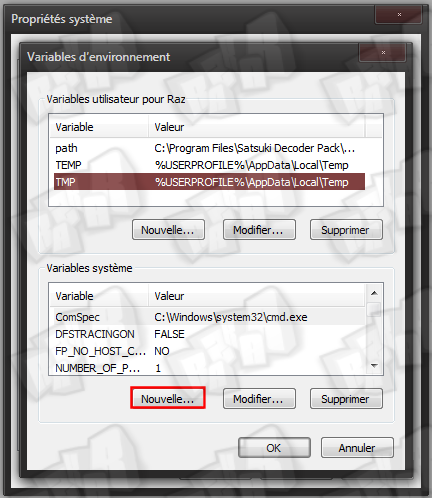
Step 5 : Click on new in system variable
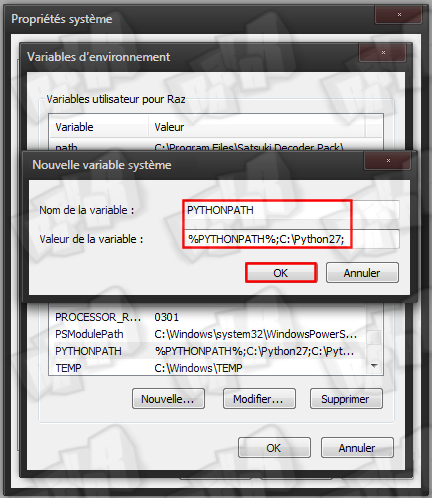
Step 6 : Add this for the name and the value of the variable :
PYTHONPATH
%PYTHONPATH%;C:\Python2.7 ;
III: Creating the Hackimage
Step 1 : Download this archive
Step 2 : Put your original NAND dump in the root of the gggggg-folder and create an output folder (in the root aswell).
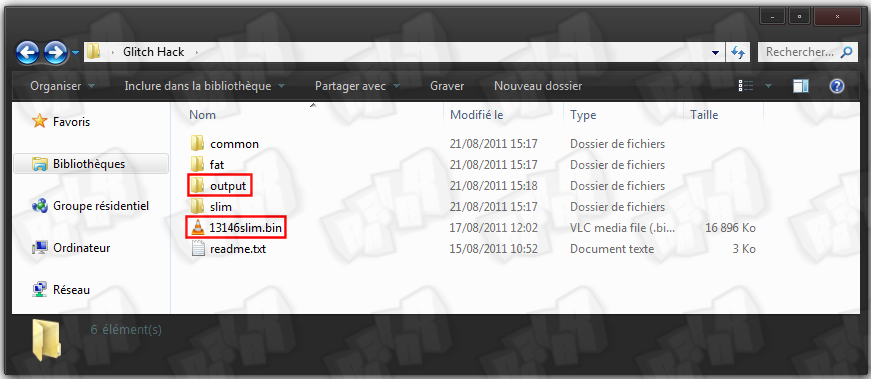
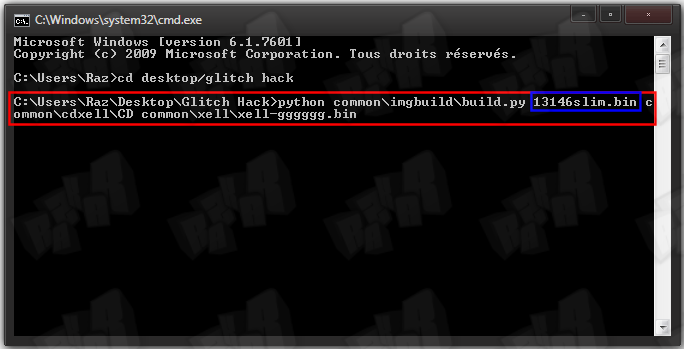
Step 3 : Open windows’s command prompt again and navigate to the gggggg-folder, then type this python command (don’t forget to modify it with your NAND dump name) :
python common\imgbuild\build.py nanddumpname.bin common\cdxell\CD common\xell\xell-gggggg.bin
You should see the following
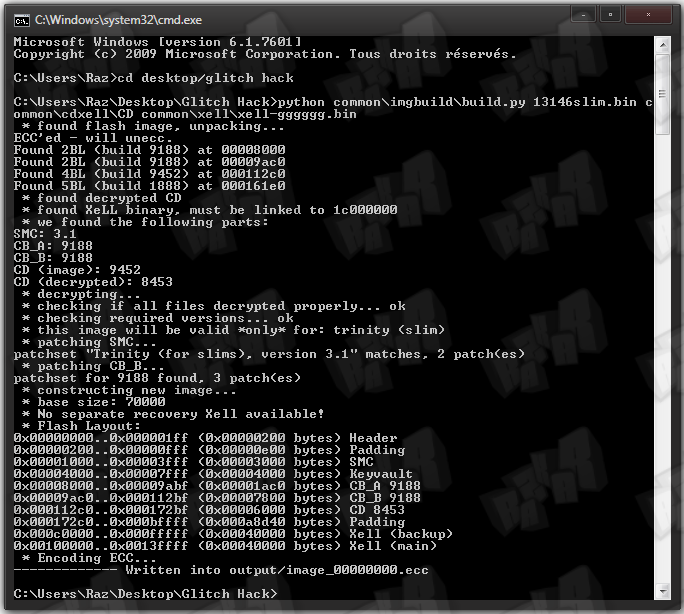
The file image_00000000.ecc is located in the output folder now.
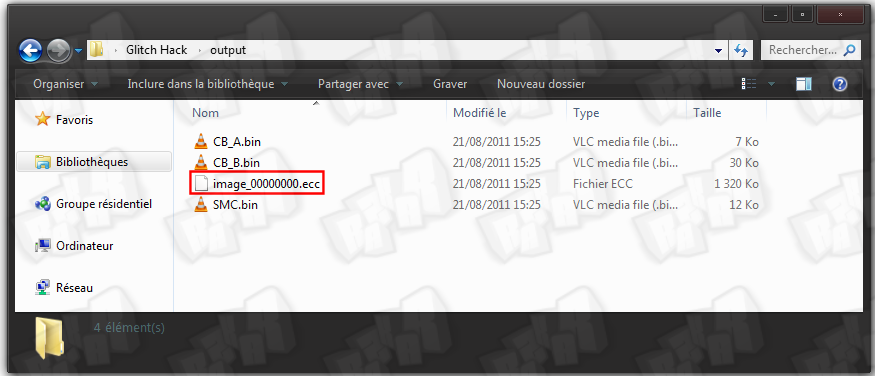
Step 4 : Copy this file into your nandpro folder and navigate to the folder via commandpromt again
Step 5 : Use the following command to flash the image to your console's NAND.
nandpro usb : +w16 image_00000000.ecc
/!\ Pay attention that you have to use the +w16 switch and not the -w16 one /!\
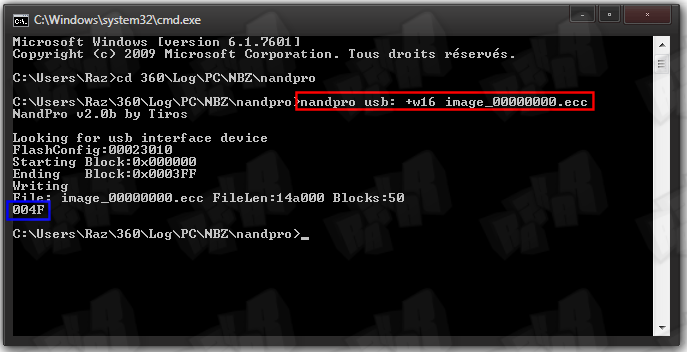
The flashed file has a size of 50 blocks so you should see 004F when the flashing is over.
IV: Programming the CPLD
Step 1 : Power your CPLD with 3.3V on pin 20 and GND on pin 21. There are many solution to do this ... here are some of them :
★ Use an old DVD drive supply cable by cutting 5 and 6 cable (3.3V and GND) and connect it to the a CK or the motherboard drive socket
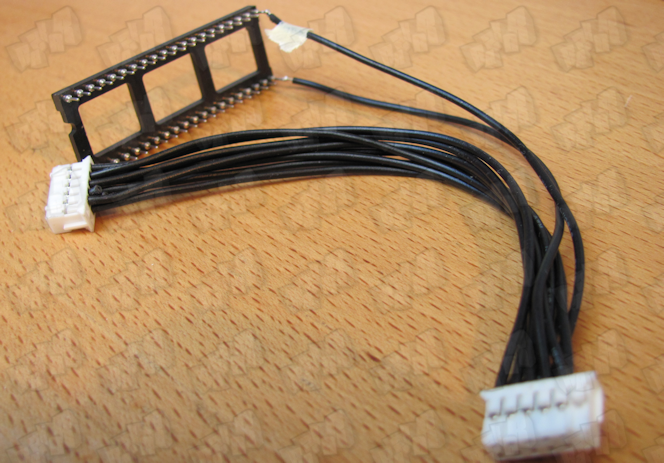
★ Solder the pin 20 to the J2C1.8 point of the motherboard and pin 21 (GND) to a point of the motherboard like the legs of the various connector-metalcasing.
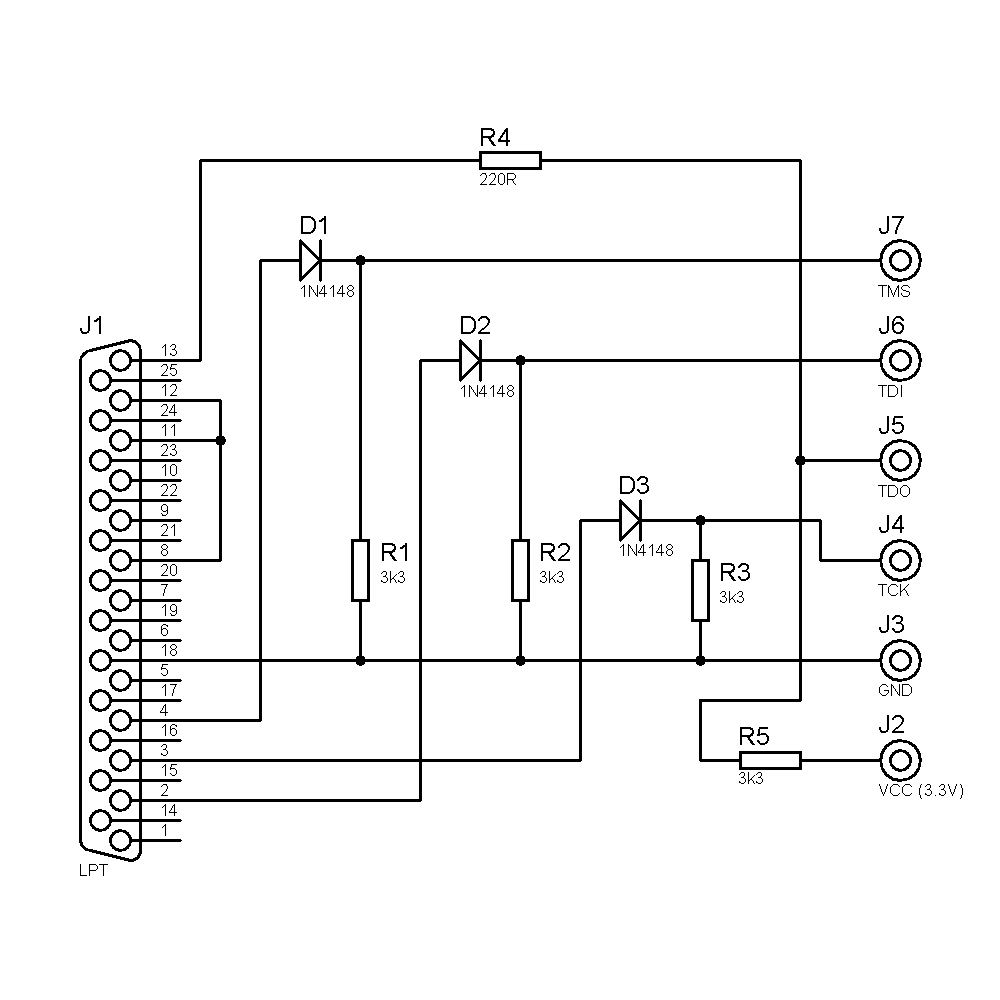
Step 2 : Grab your LPT/USB XilinX JTAG programmer cable. If you don't have one, you can use GliGli's schematic to build a LPT JTAG Programmer. Connect the cable to the PC and the CPLD.
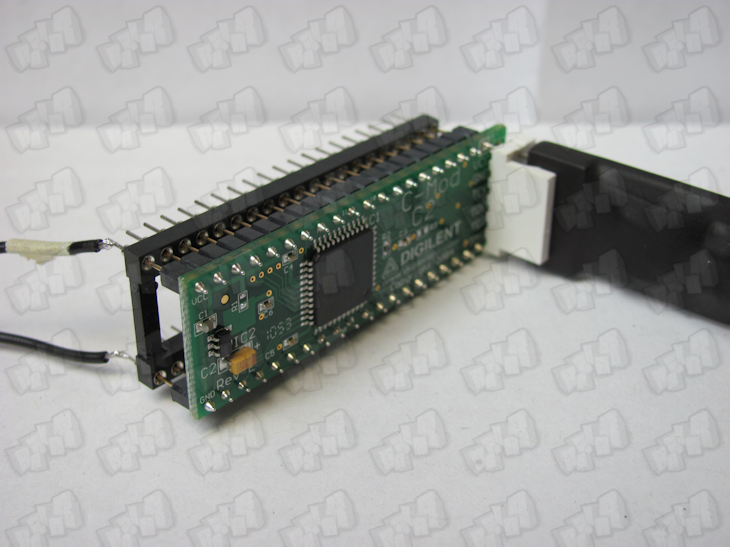
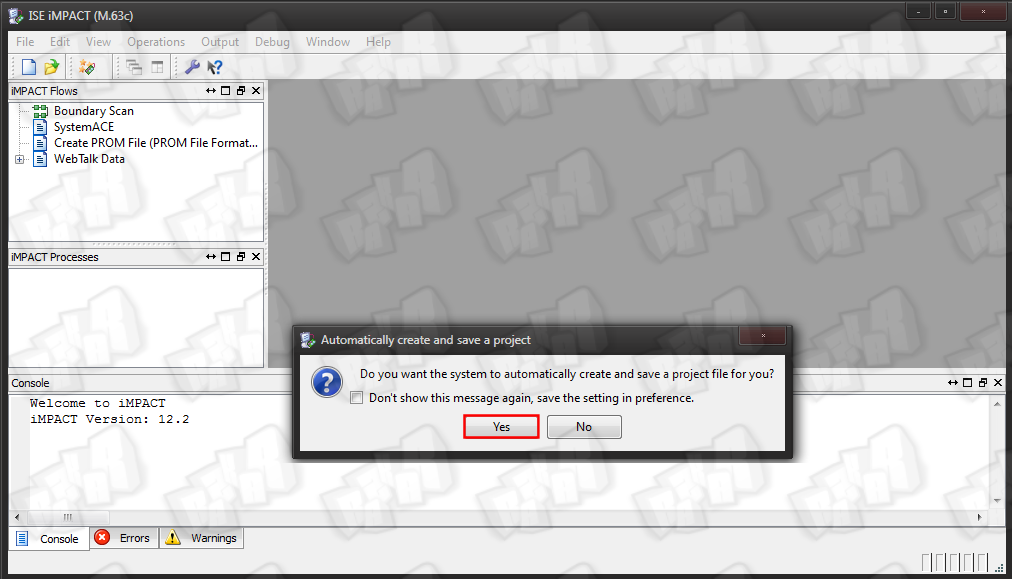
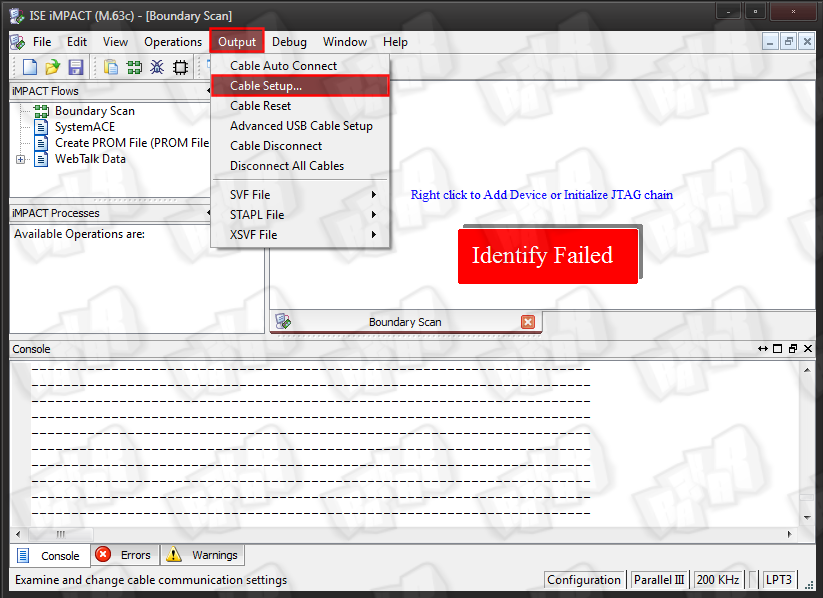
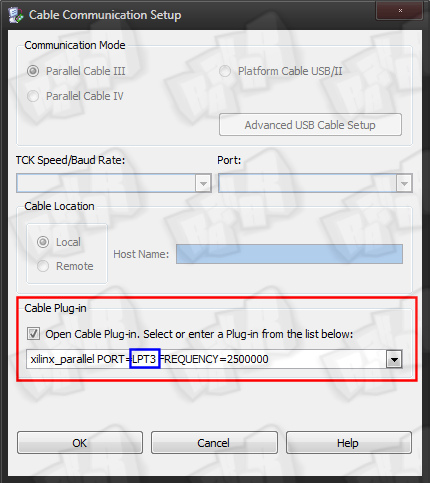
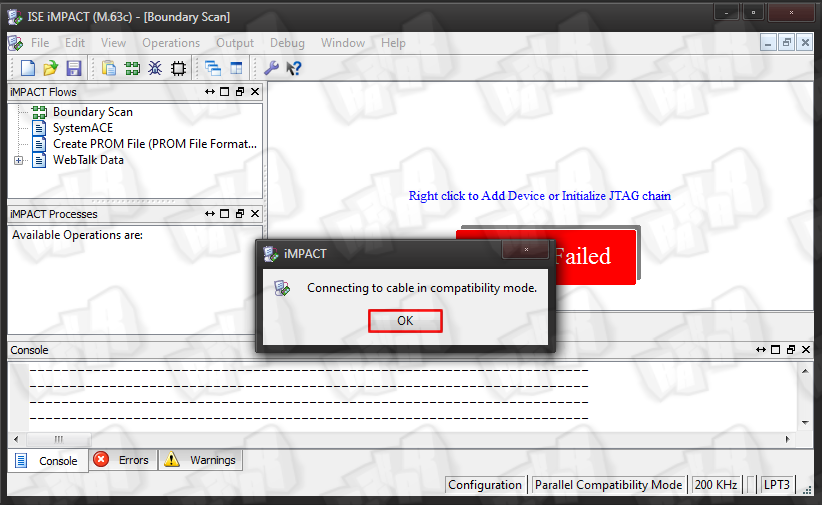
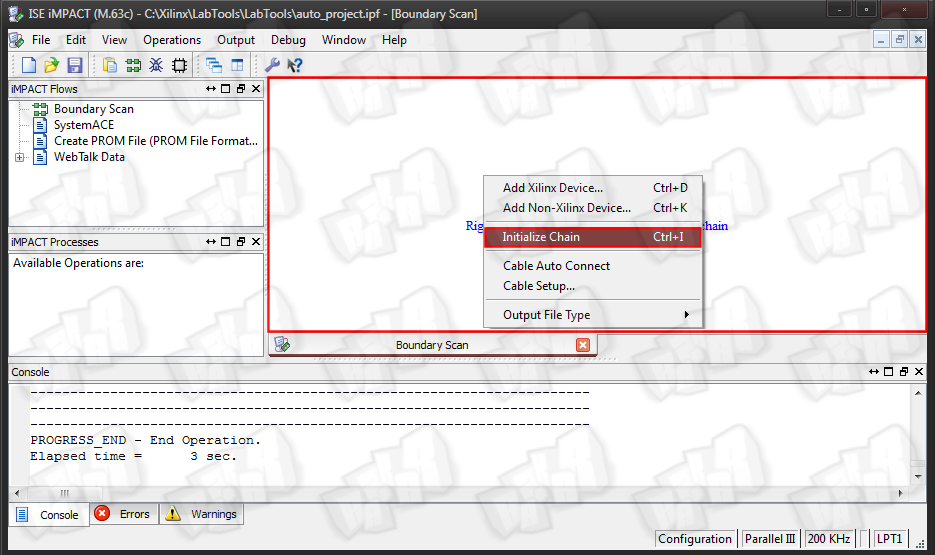
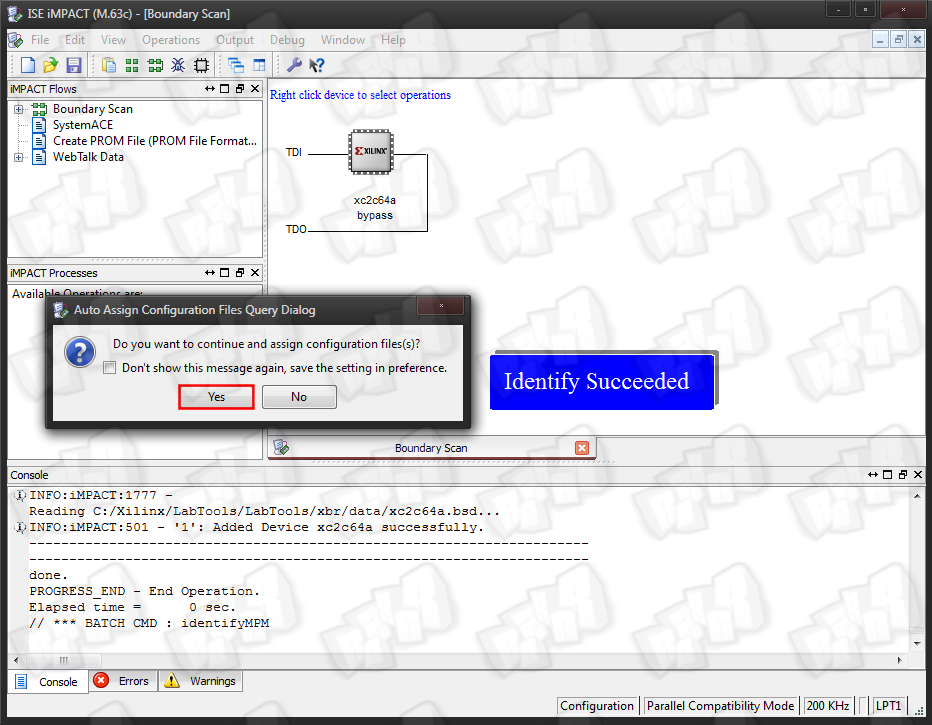
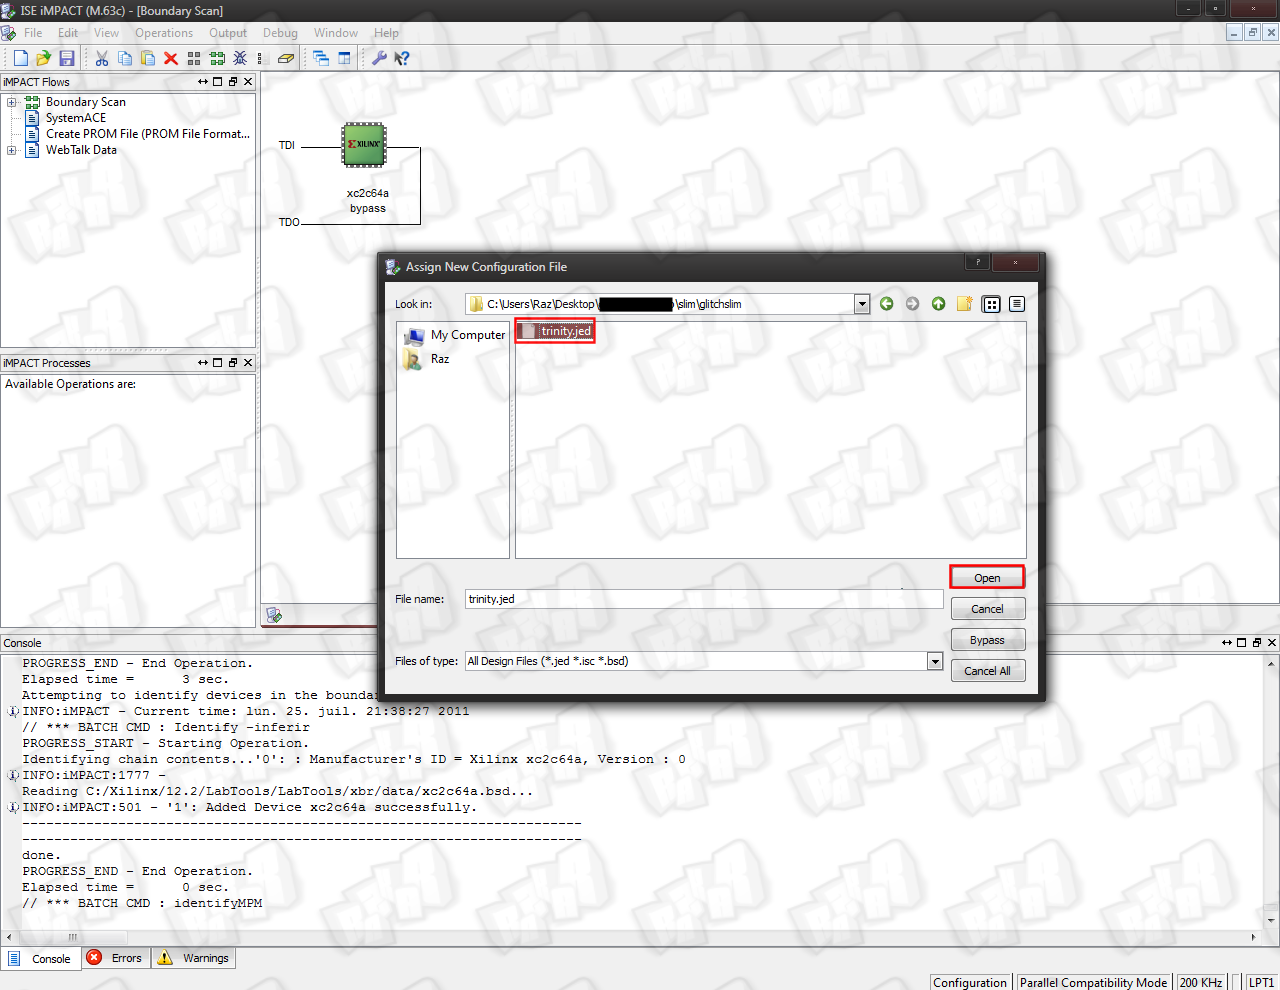
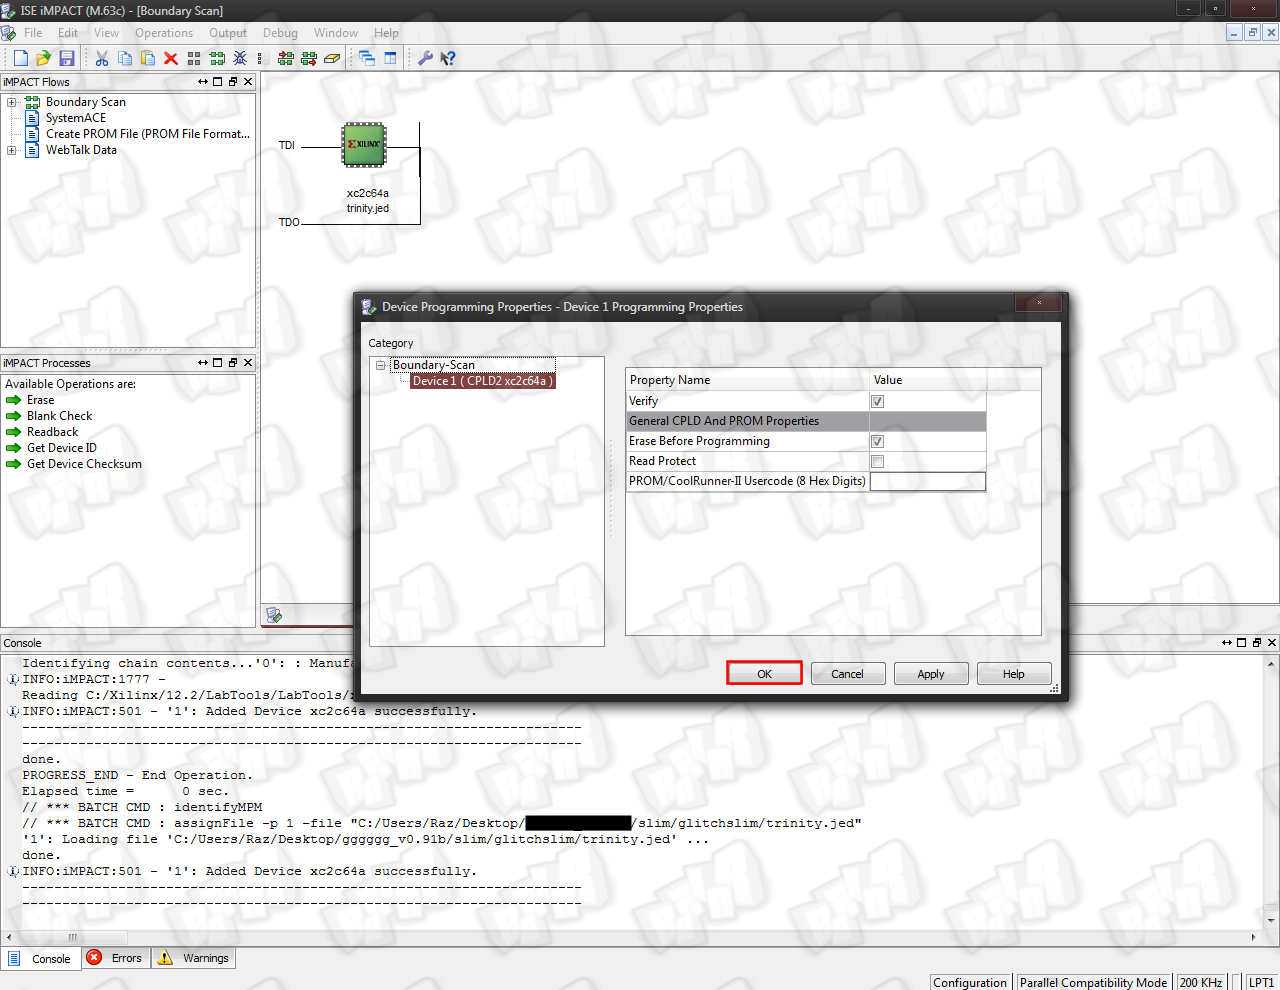
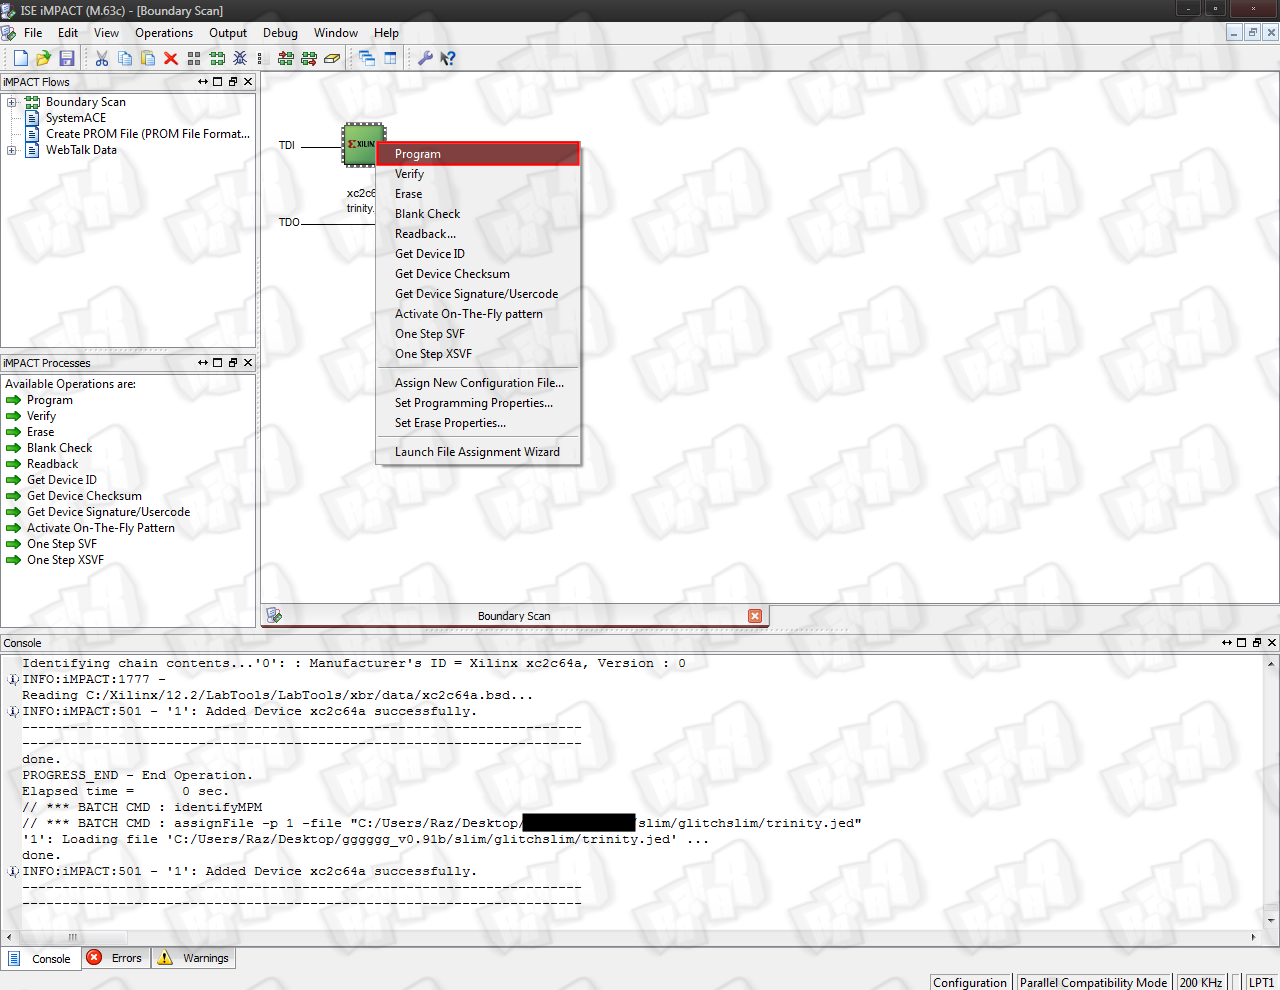
Step 3 : Launch "iMPACT" (from XilinX Lab Tools) and let's start the programming ... just follow the images.
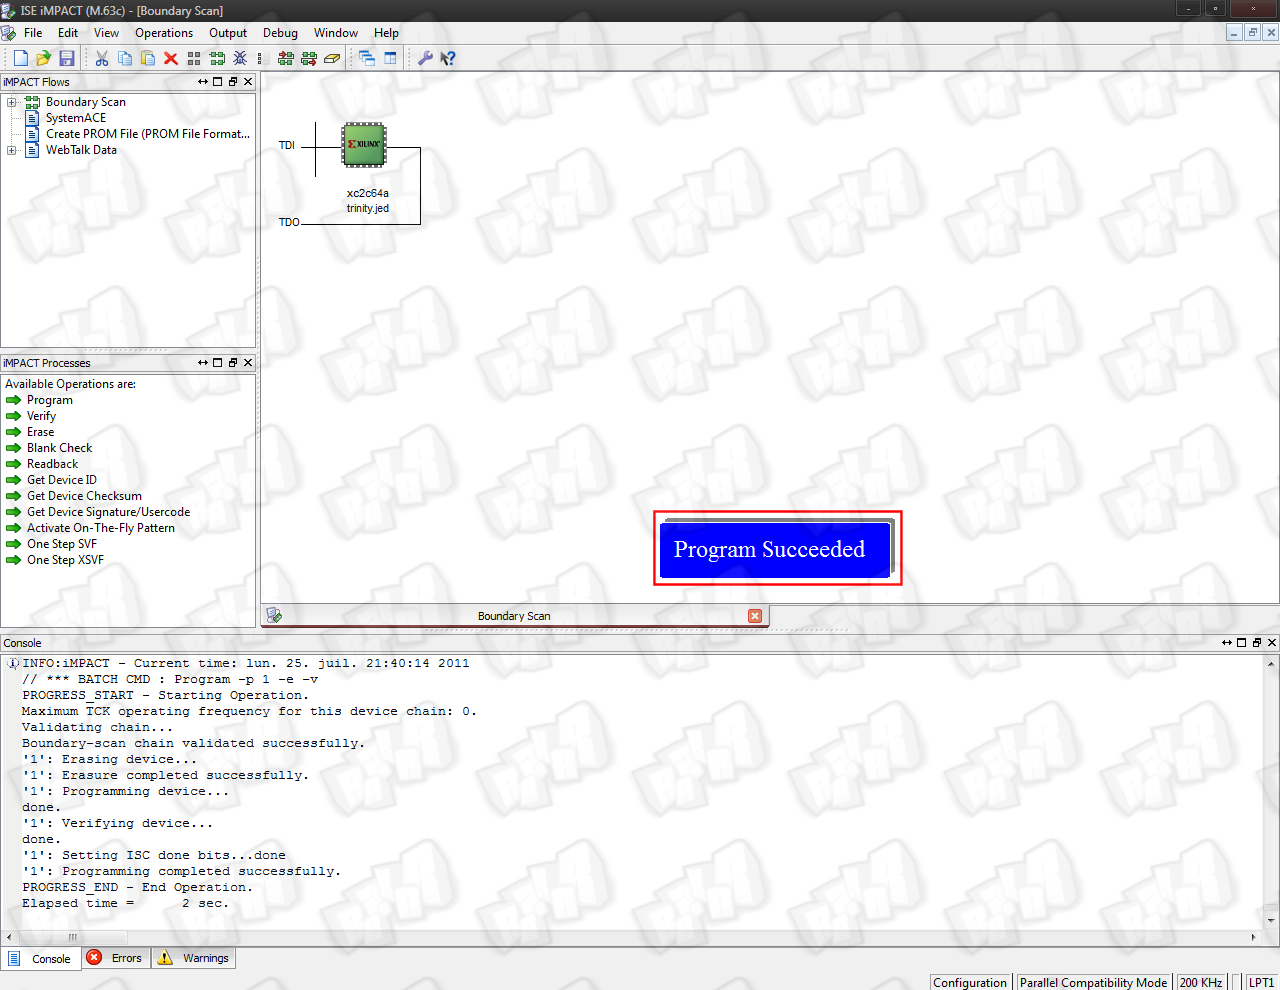
IV: The wiring
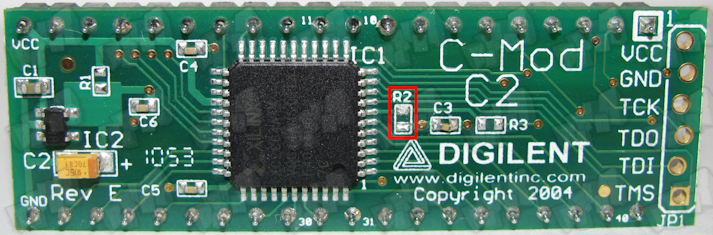
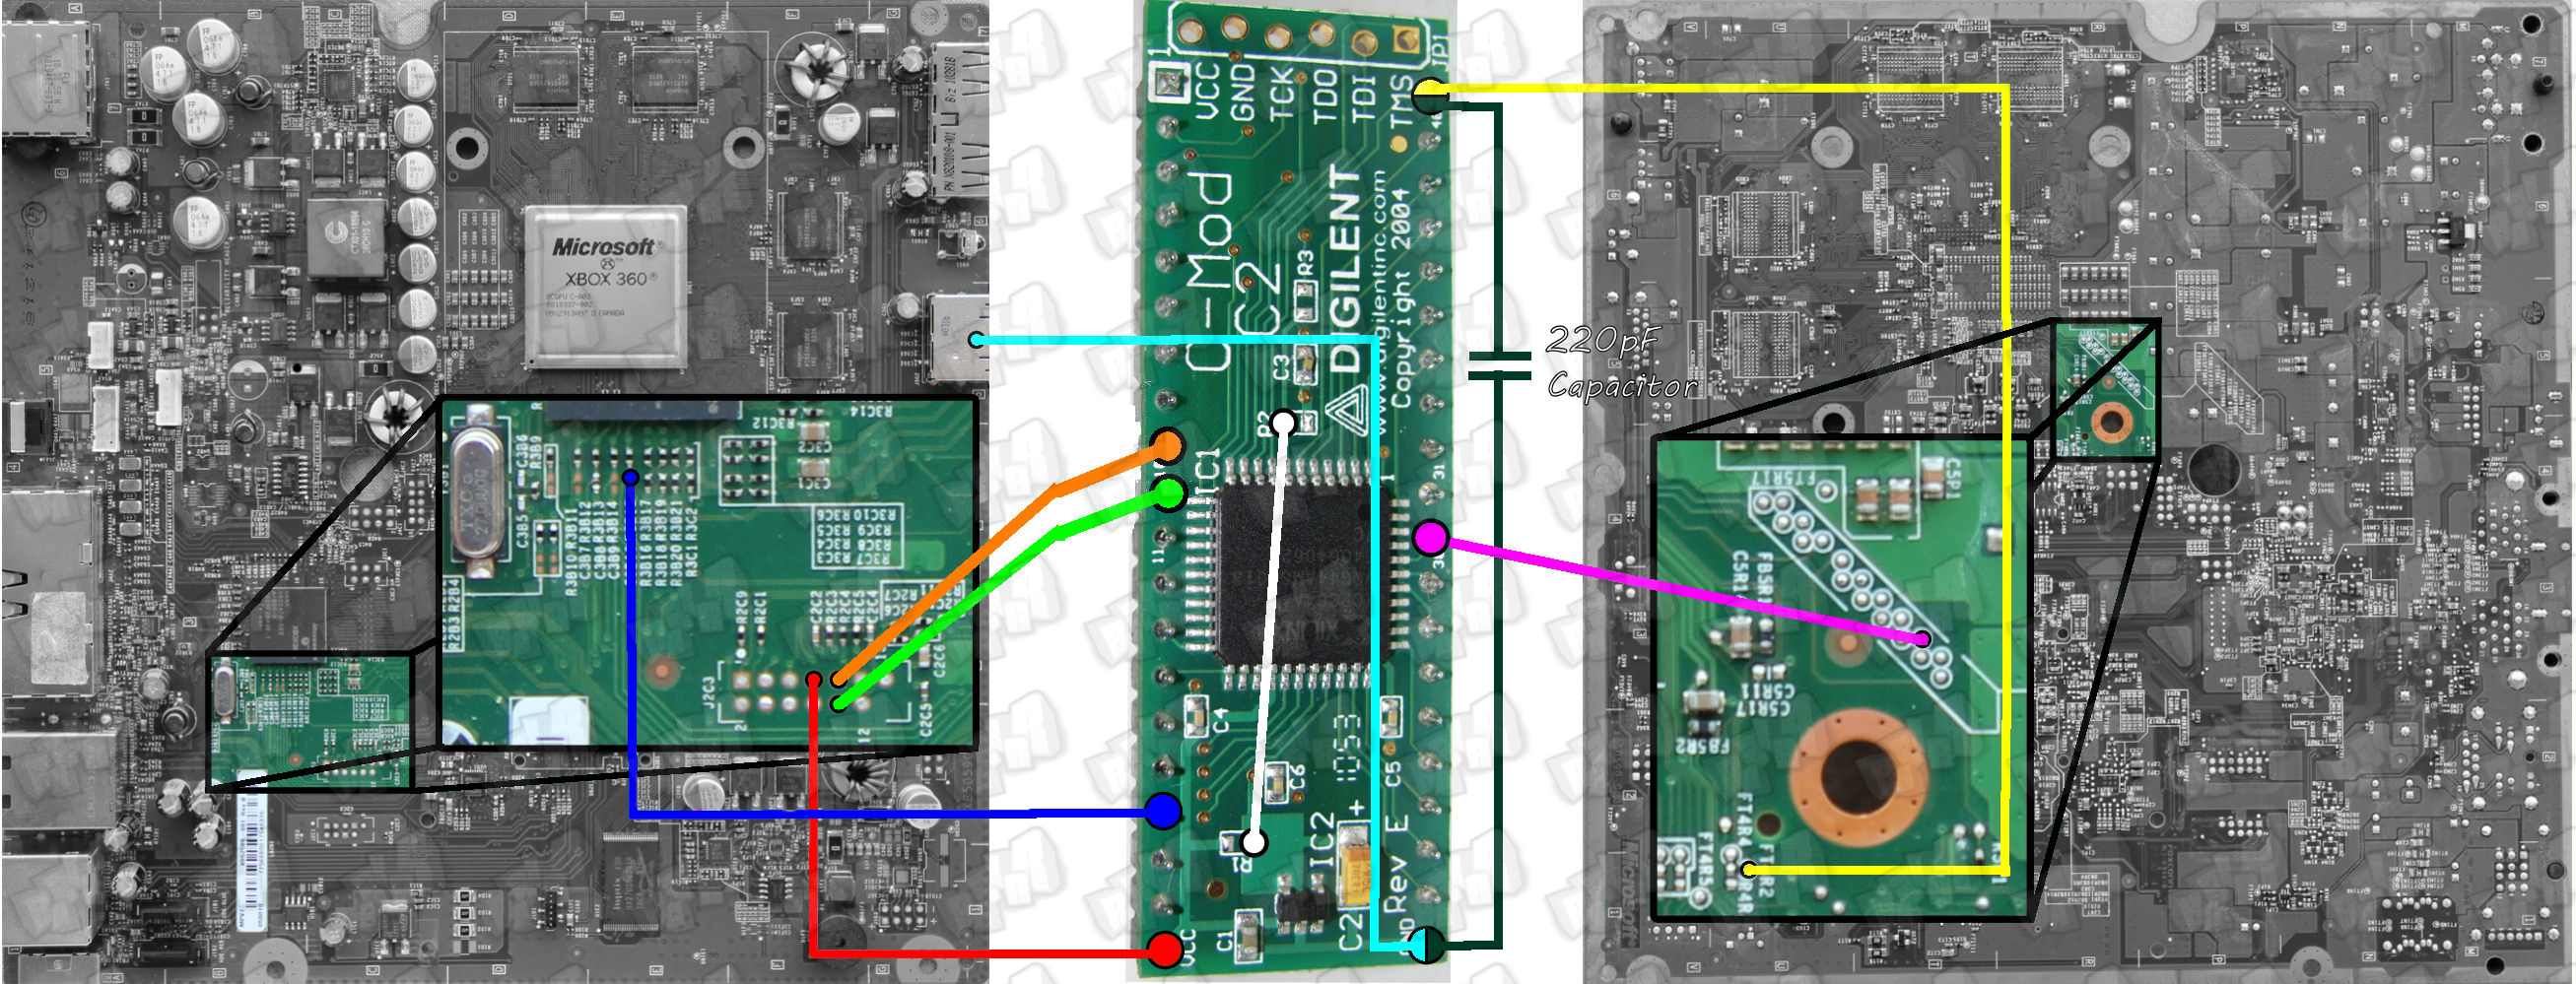
Step 1 : On the CPLD, remove the Resistor R2 and connect R2's upper pad to R1's lower pad.
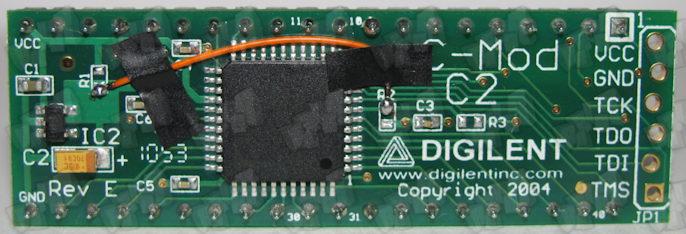
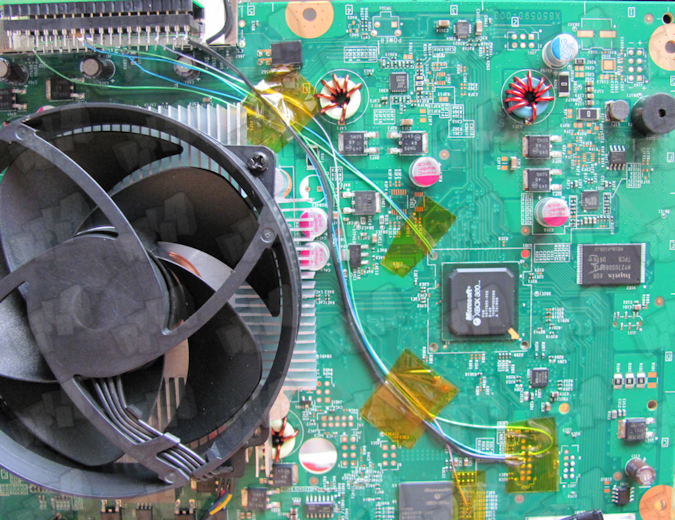
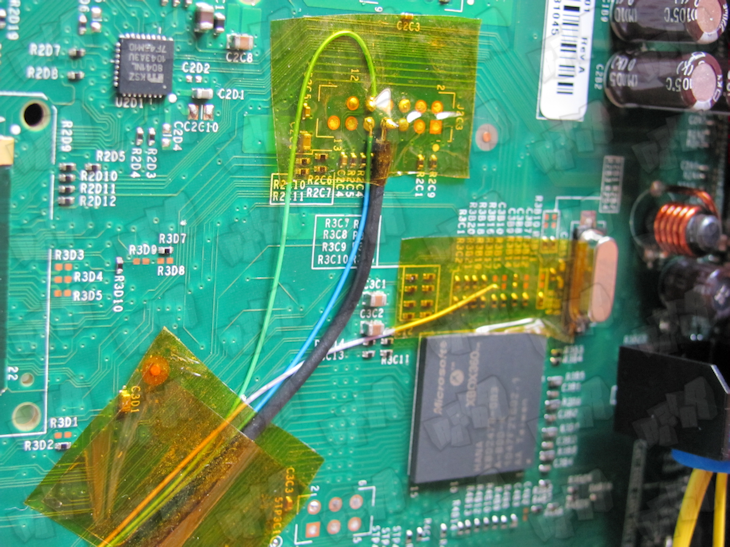
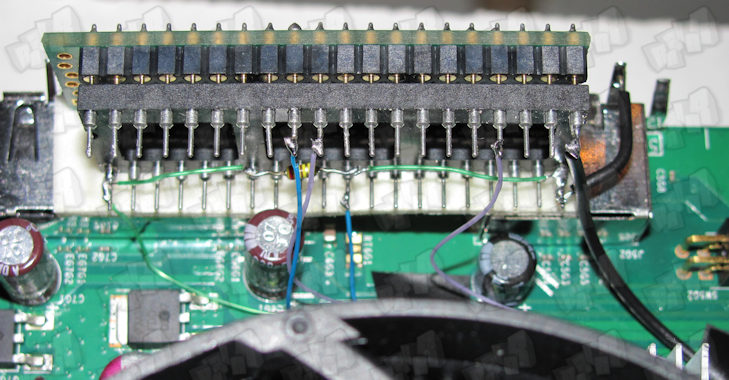
Step 2 : Place the CPLD on the motherboard like you see on the picture. We recommand to use double coated tape + material to isolate the CPLD.
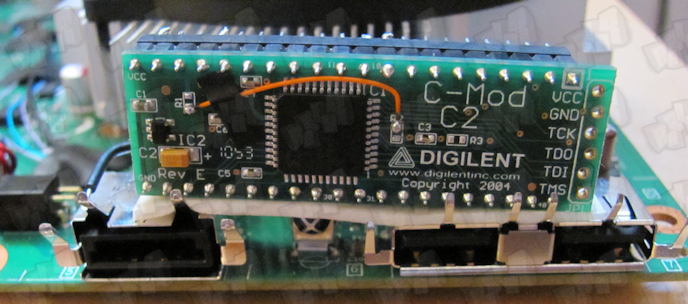
Step 3 : Use the following diagram to solder all needed connections. It’s recommended to use a socket!

V: ENJOY
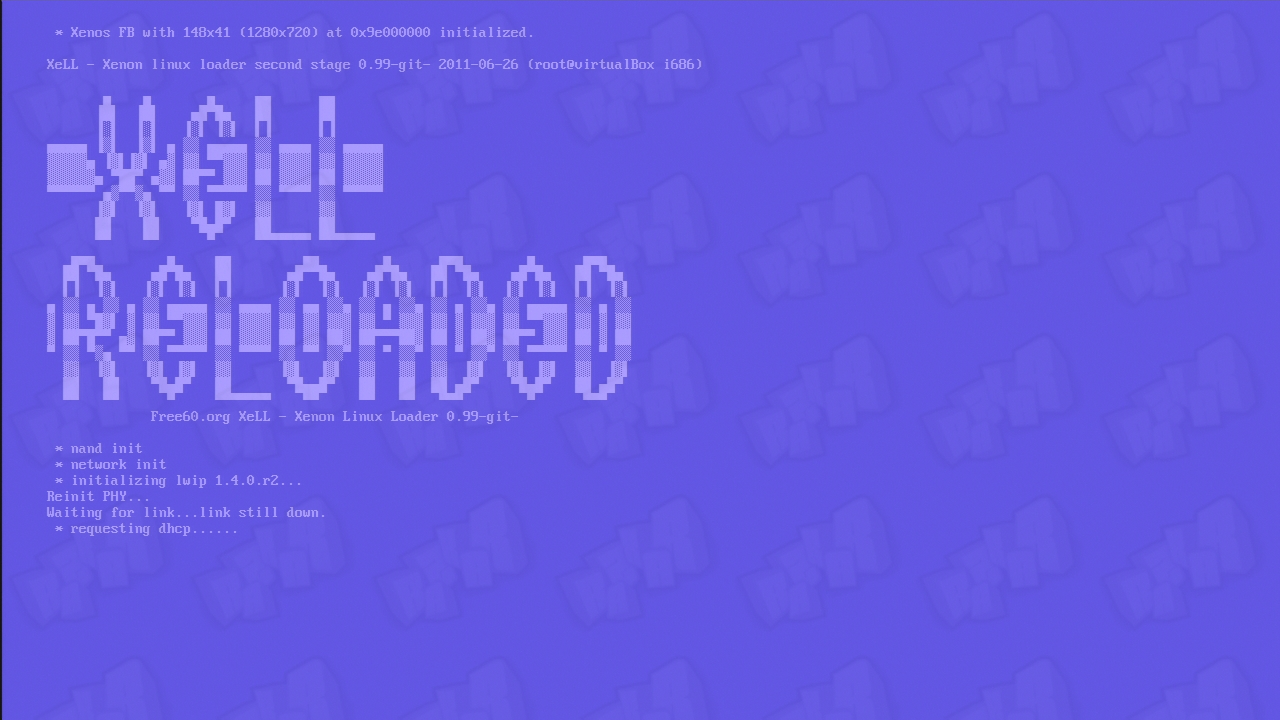
You can now start your console normally and see XeLL boot within 2 minutes. You can now enjoy running unsigned code on your slim.
VI: GREETZ
Time for the Gold Stars delivery:
★ GliGli for his patience and all the explanations he gave me.
★ GliGli and Tiros for the hack
★ Cancerous, Ced2911, Tuxuser et [cOz] for their helps and support.
I: Software and Hardware needed
Prerequisites :
★ Installed XillinX Lab Tools
Software :
★ Python and Pyton Crypto
★ Impact (from Xilinx Lab Tools)
★ NandPro (>= v2.0e)
Hardware :
★ USB SPI Programmer to dump/flash the Xbox360's NAND
★A XC2C64A CoolRunner-II CPLD (aka Digilent C-mod), matching socket and a XilinX JTAG Programmer cable
★ A 220pF capacitor
★ Soldering material & Soldering experience
II: Dumping NAND
Step 1 : Use the following diagram (or MODFREAKz's one) to Solder your USB SPI Programmer to the Xbox 360 motherboard
Step 2 : Open windows’s command prompt and launch NandPro.
Step 3 : Dump your nand twice by using the read command for 16MB NAND :
nandpro usb : -r16 nanddumpname.bin
Step 4 : Compare the two dumps with the following command (you can use md5checksum too) :
fc /b nanddumpname.bin nanddumpname2.bin
You should have something like FC : No difference found. If the two dumps don’t match, do a new dump and check again.
II: Installation of Python and Python Crypto
Step 1 : Install Python 2.7 (32bit!) with the default settings :
Step 2 : Install PyCrypto 2.3 with the default setting :
To enable python in windows’s command prompt, we will have to modify the environment variables .
Step 3 : Go in Control Panel > System > Advanced system settings
Step 4 : Click on environnement variables
Step 5 : Click on new in system variable
Step 6 : Add this for the name and the value of the variable :
PYTHONPATH
%PYTHONPATH%;C:\Python2.7 ;
III: Creating the Hackimage
Step 1 : Download this archive
Step 2 : Put your original NAND dump in the root of the gggggg-folder and create an output folder (in the root aswell).
Step 3 : Open windows’s command prompt again and navigate to the gggggg-folder, then type this python command (don’t forget to modify it with your NAND dump name) :
python common\imgbuild\build.py nanddumpname.bin common\cdxell\CD common\xell\xell-gggggg.bin
You should see the following
The file image_00000000.ecc is located in the output folder now.
Step 4 : Copy this file into your nandpro folder and navigate to the folder via commandpromt again
Step 5 : Use the following command to flash the image to your console's NAND.
nandpro usb : +w16 image_00000000.ecc
/!\ Pay attention that you have to use the +w16 switch and not the -w16 one /!\
The flashed file has a size of 50 blocks so you should see 004F when the flashing is over.
IV: Programming the CPLD
Step 1 : Power your CPLD with 3.3V on pin 20 and GND on pin 21. There are many solution to do this ... here are some of them :
★ Use an old DVD drive supply cable by cutting 5 and 6 cable (3.3V and GND) and connect it to the a CK or the motherboard drive socket
★ Solder the pin 20 to the J2C1.8 point of the motherboard and pin 21 (GND) to a point of the motherboard like the legs of the various connector-metalcasing.
Step 2 : Grab your LPT/USB XilinX JTAG programmer cable. If you don't have one, you can use GliGli's schematic to build a LPT JTAG Programmer. Connect the cable to the PC and the CPLD.
Step 3 : Launch "iMPACT" (from XilinX Lab Tools) and let's start the programming ... just follow the images.
IV: The wiring
Step 1 : On the CPLD, remove the Resistor R2 and connect R2's upper pad to R1's lower pad.
Step 2 : Place the CPLD on the motherboard like you see on the picture. We recommand to use double coated tape + material to isolate the CPLD.
Step 3 : Use the following diagram to solder all needed connections. It’s recommended to use a socket!
V: ENJOY
You can now start your console normally and see XeLL boot within 2 minutes. You can now enjoy running unsigned code on your slim.
VI: GREETZ
Time for the Gold Stars delivery:
★ GliGli for his patience and all the explanations he gave me.
★ GliGli and Tiros for the hack
★ Cancerous, Ced2911, Tuxuser et [cOz] for their helps and support.

 Originally Posted by Versa